


Page last Modified:
Saturday, January 27, 2007 11:41:22 PM - Views

This is a HUGE combination technote with content from
some
![]() technotes as well.
technotes as well.
|
Quick Launch (on this page) |
|
[Buying Parts] [Thermostat] [Hoses] [Water Pump *NEW*] [Heater Core] [Expansion Tank] [Radiator Fans] [Oil Cooler] [Troubleshooting the cooling system] |
Buy Coolant
Parts (links)
To buy some of the rarer hoses, try
TT tuning's page.
![]() How to replace the Thermostat...
How to replace the Thermostat...
If you have power steering - There's a lot more involved here -
basically, remove your belts - then remove your power steering pump and
set it aside.
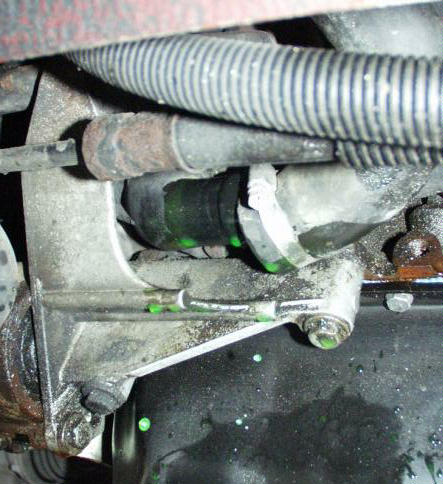 |
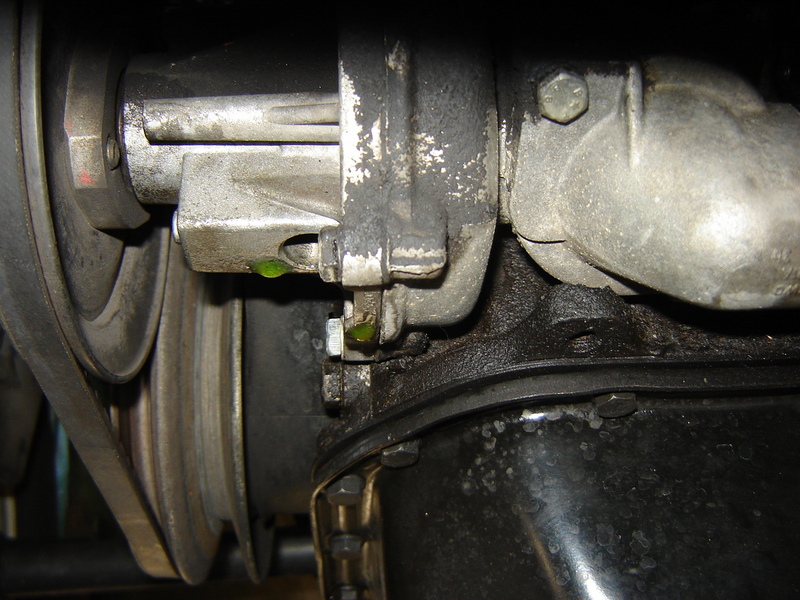
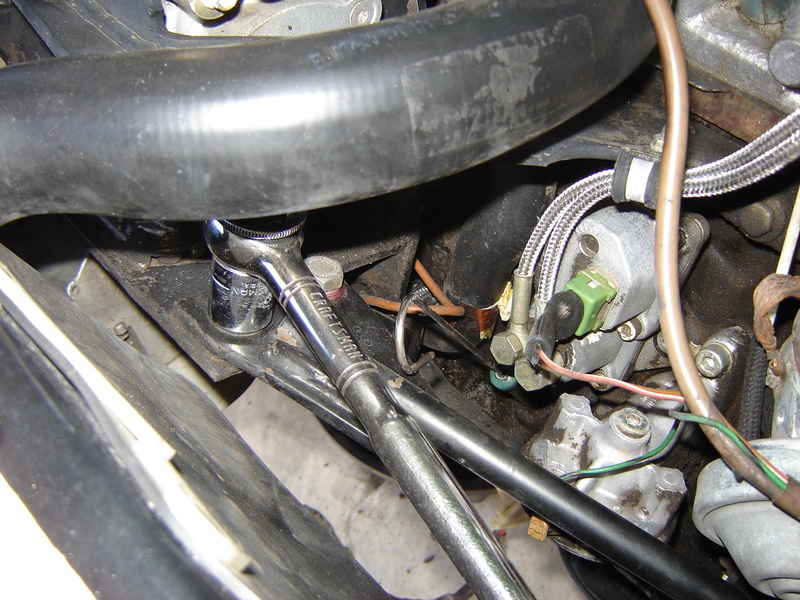
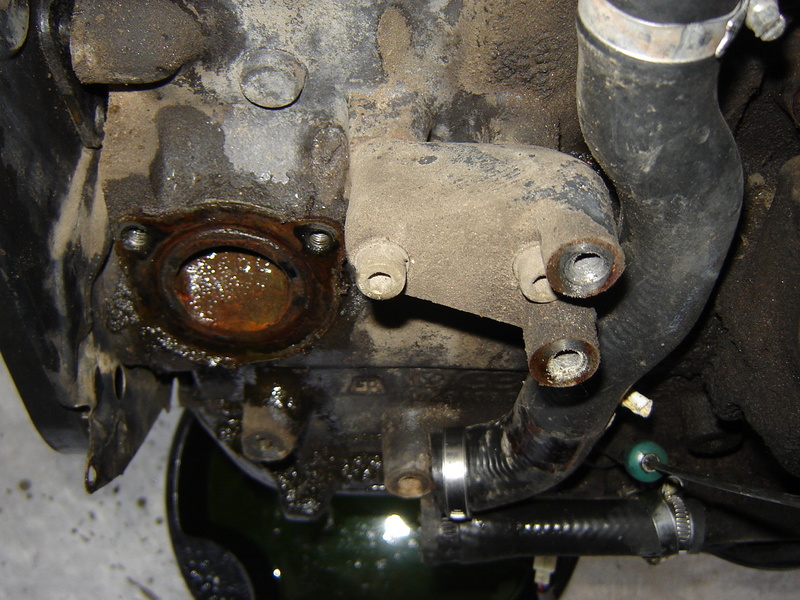
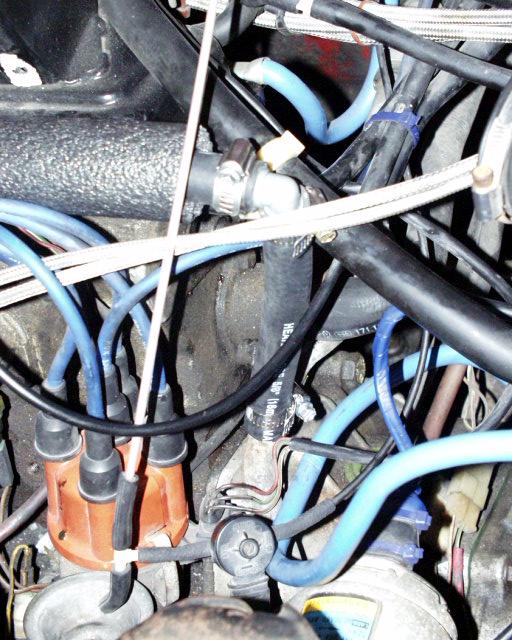
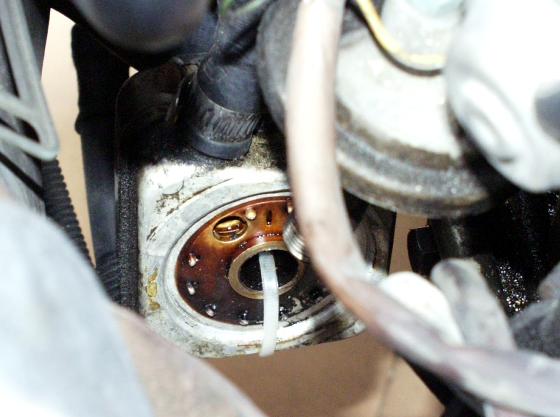
1. After Removing the power steering pump here is the location of the thermostat housing. This picture shows the coolant drained. |
 |
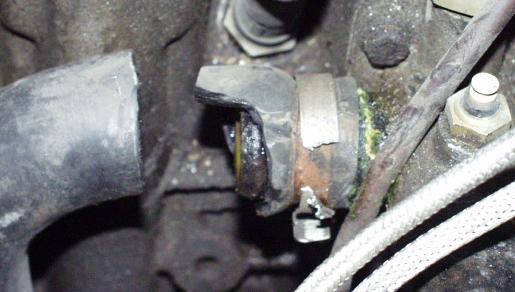
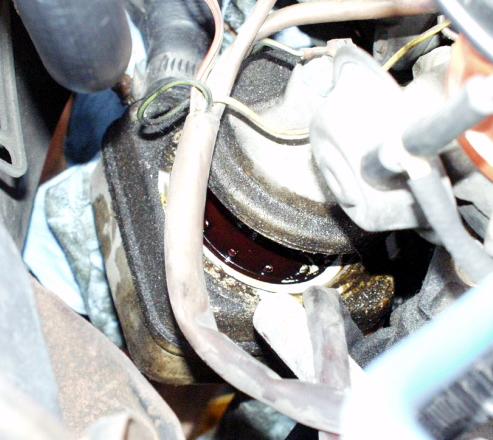
4. This shows where the rubber seal sits on the elbow of the housing. |
 |
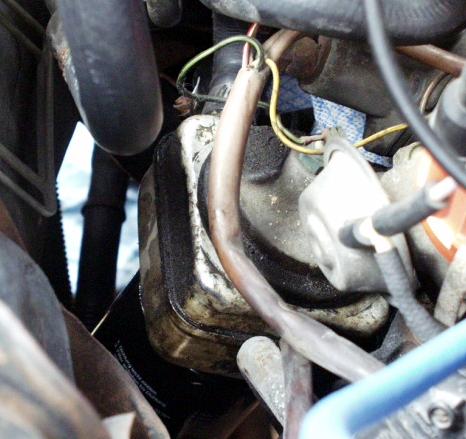
2. Move aside the coolant hose, and loosen the two bolts that hold the housing to the water pump. Remove the housing, take the thermostat out (just pull it out), then clean the housing. |
 |
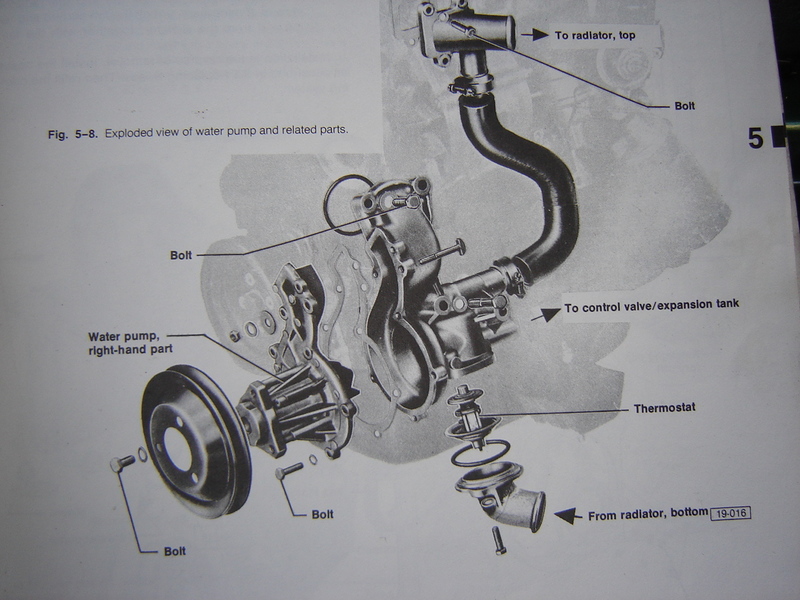
5. Put the new thermostat in - noting the coolant flow (there's usually an arrow - make it point to the lower hose to the radiator). Put the elbow back in place with the rubber gasket, and reconnect the hose. |
 |
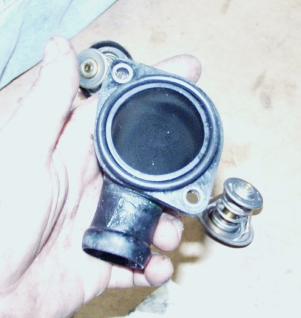
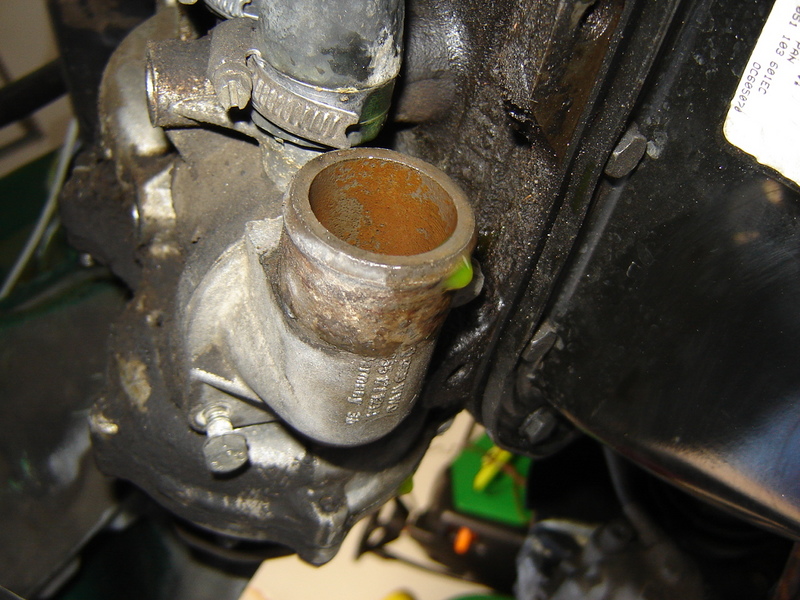
3. Clean out the inside of where the thermostat sits in the pump.
Here is the cleaned out housing mouth... |
6. Refill the coolant - and start your engine up, filling up the coolant
level as the air escapes the system. once the coolant levels off close the
cap and let run for 10 minutes.
|
|
![]() Replacing the
Hoses
Replacing the
Hoses
You can buy the upper, lower, and bypass hoses at most auto parts stores
- but to get some of the weird hoses (like the oil cooler T hose, or the
16v bypass hose) - you must order them from online.
 |
1. This picture shows the Upper radiator hose and Lower radiator hose, to change hoses you will need to empty your coolant from your car - loosen the lower radiator hose and drain into a bucket. Once it is drained, loosen the upper hose and replace it. |
|
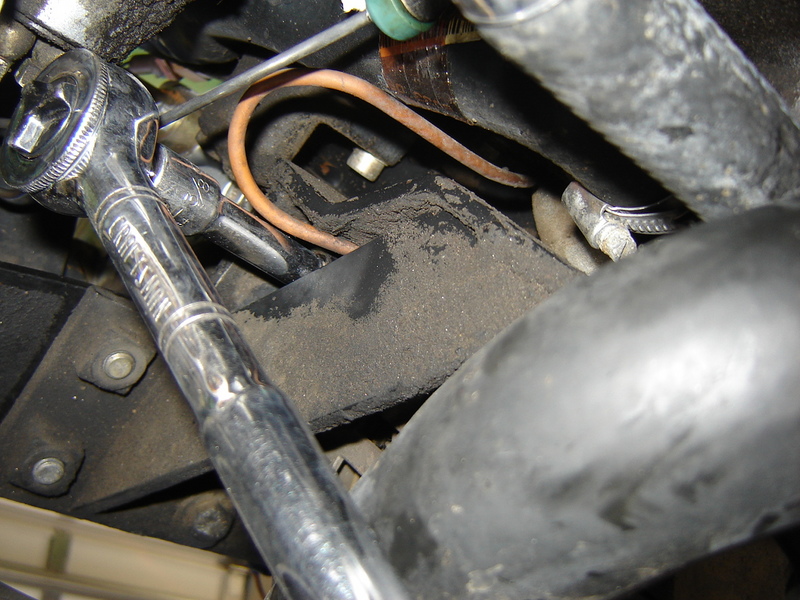
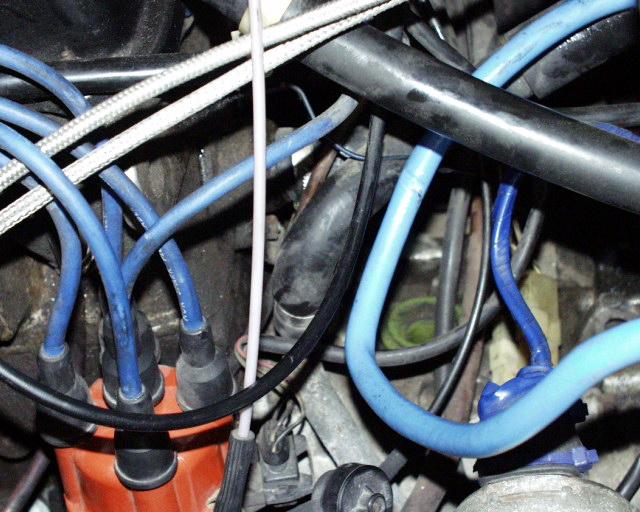
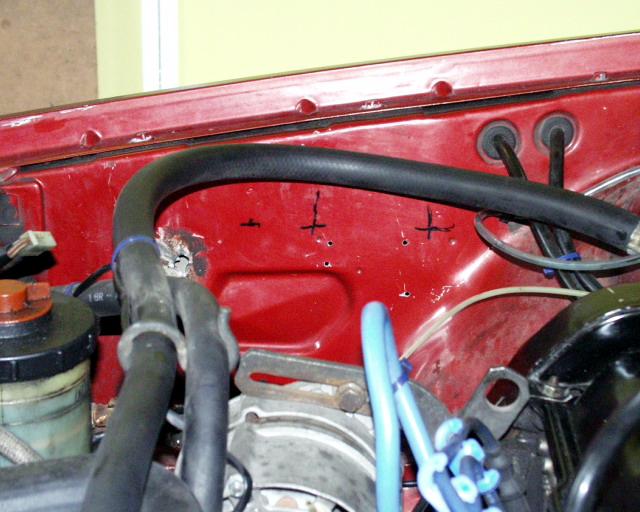
5. In this picture you can clearly see the T hose for the water pump, this is part of the Oil cooler system, it is a little bit difficult to remove, if you look carefully there is a bolt to loosen the metal pipe that goes up to the heater core. |
|
|
2. Continue in the same manner changing the lower radiator hose, attached to the thermostat. |
 |
6. If you have a rusted clamp on your hands, cut it. GET NEW CLAMPS!! |
 |
3. This shows the hoses where they go into the head. The one that goes down to the left is the bypass hose. |
 |
7. If an old hose won't pull off - cut it. Be careful not to damage the flange. |
 |
4. This shows the bottom of the bypass hose. Loosen and replace it. |
 |
8. Rotten hose. Fun, Huh? |
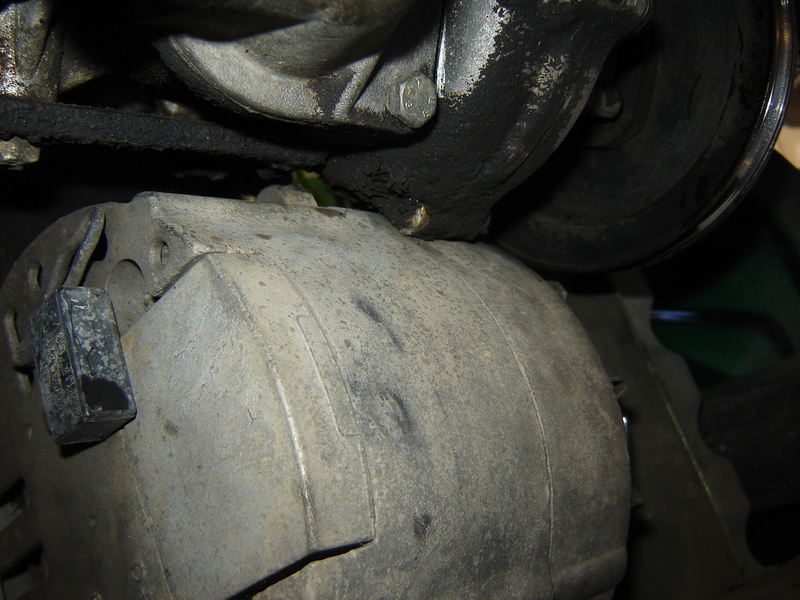
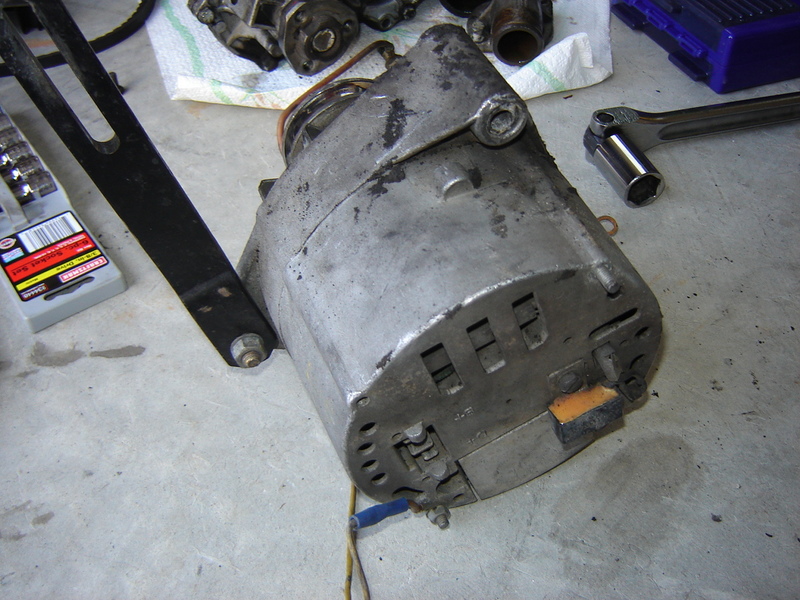
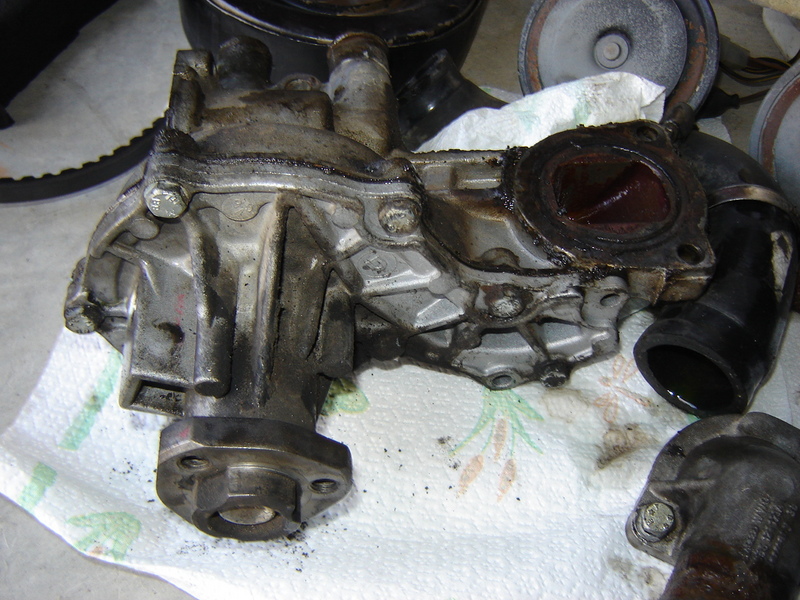
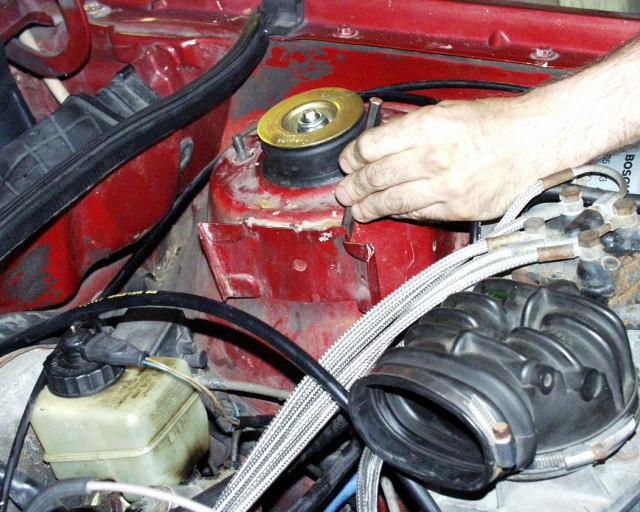
This details replacing the waterpump in the Early style factory A1 cars. It is FAR easier in a Non-A/C car, and fairly easy in a newer style A/C car. The Old style can be identified by the square compressor on top.
Extra special thanks to VWVortex user petebee (Peter Brown) who provided the pictures and notes!!


![]() Heater Core
Heater Core
This is a really good time to replace your heater valve - even if you
don't need it - it's still a good idea.
You have to drain the cooling system before doing this - you'll want to
have a bucket handy inside the car too!
If you don't have A/C - then this is a joke. It's really easy to
do the heater core. Just snap off the cover on the driver's side.
Unclamp the hoses, slide out the heater core.
If you have A/C - Then it sucks to be you! - Just kidding - Here's the technote - based on the technote from the Drivers Found Website
|
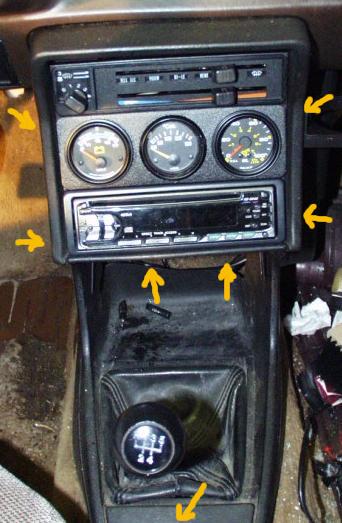
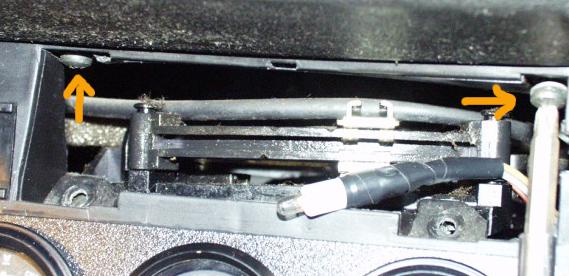
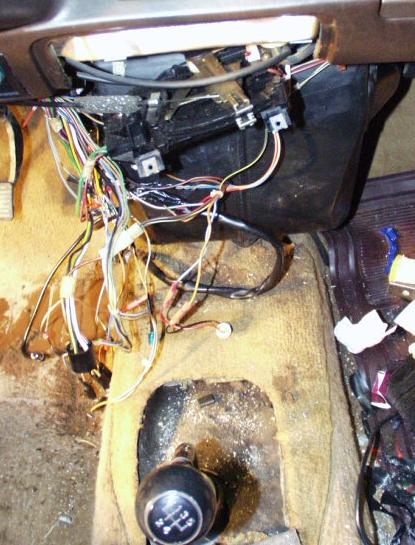
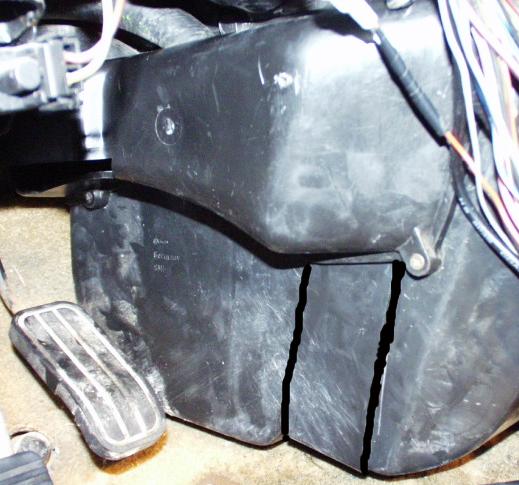
1. First Step is to remove the top and bottom of your console, seeing on this picture, the arrows indicate the first set of screws to remove. |
 |
7. gently pull the plastic cut out and bend at bottom of box. The heater core is ready to be removed. Remember - it still has coolant in it. Slide it gently out. |
|
2. Pull out the 2 heater control handles and
the speed control of the fan and pop out the heater control
panel out. 2 screws that hold the controls to the console
need to come out. The second picture shows the next 2 screws that need to come out before you can start removing the top console part - I you can't get the console off - this is probably what's holding it back. |
 |
8. This shows the area clear of the heater core, clean it out - it will have gunk in it (especially if your heater core leaked a lot like mine did. once done slide the replacement heater core in place. |
|
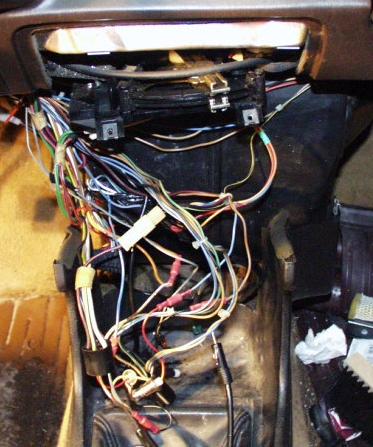
3. Unplug your stereo and gauges and stuff. Unscrew the shifter ball, and remove the shifter boot. |
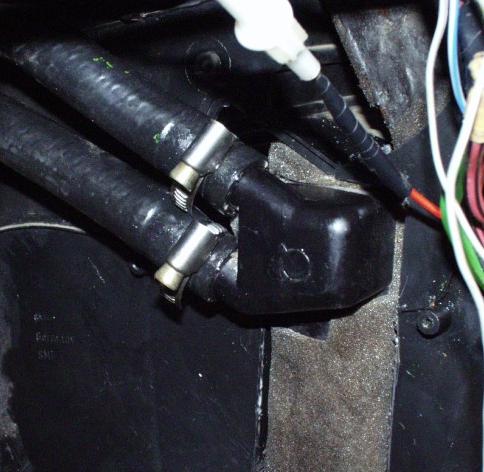 |
9. Reconnect the hoses and screw the clamps down. Refill your loss coolant, and start the engine, let it run until it is warm and the coolant is circulating - making sure you check your hoses for leakage. (you need to have the heater set to HOT for the circulation to occur) |
|
4. It's easier to get the console off with the parking brake down, the seats slid all the way back and the shifter in 4th gear. |
|
10. Next remember the plastic cover that was
such a pain in the butt to remove first few steps ago?
Here's how you modify it. You will loose a little bit of air
pressure in the vents - but it all goes to your feet - so
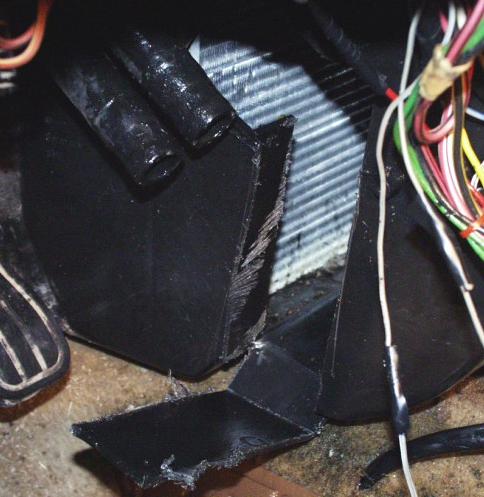
It's not so bad. Here is the modified cover, I used the hack saw blade again and cut a slide through slots for the hoses. Now you can just slide the cover back on the hoses. This works - that is all that counts. |
|
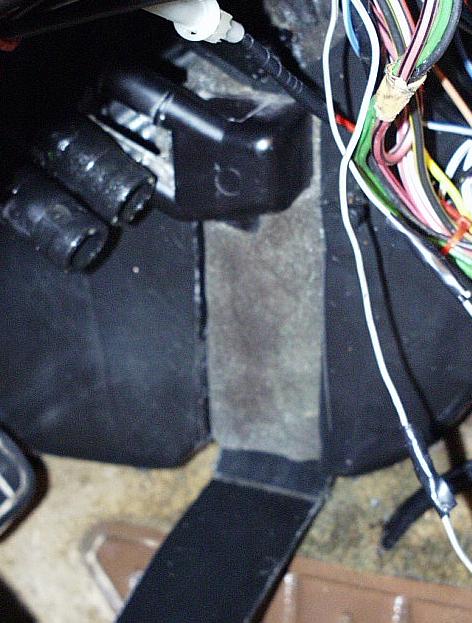
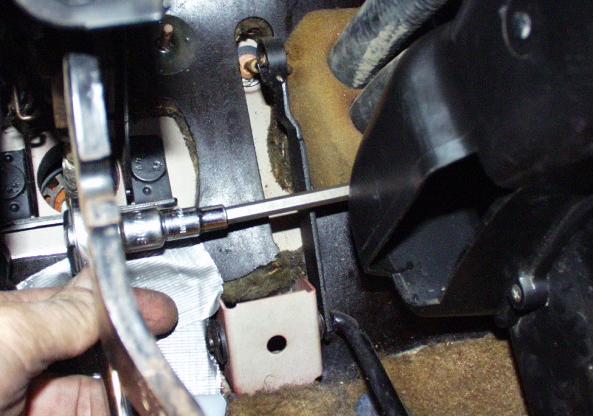
5. The heater core will be reached from the driver side of the box, you will notice a box screwed in with 4 screws, 3 of which are easy enough to reach, but the fourth one is located at the rear, at the top of the box (the picture shows the location and what tool to use to reach it) I used a 3/8" ratchet with an 1/4" short socket using an extension magnetic tip of a screwdriver with a #2 Phillips head. |
 |
11. The Flap we cut out is held in place by the cover we screwed back unto the heater exchange box. now we are left with 2 cut outs in the air box... I used some black caulking and filled the cracks showing. You can also use a soldering iron to melt the plastic back into place. Be careful not to burn the heater core. |
|
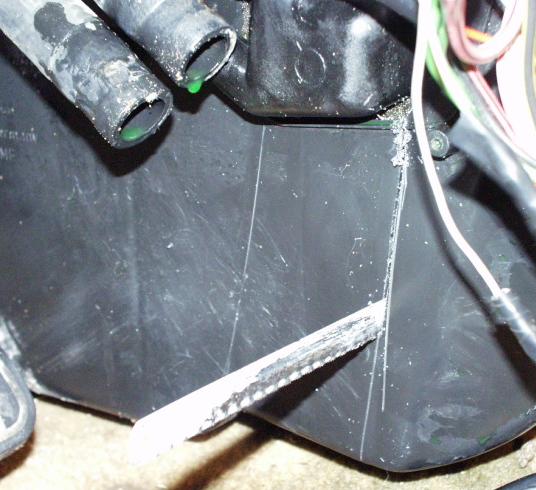
6. Get yourself a lot of paper towels, a bucket, maybe a trash bag to protect your floor. Unscrew the clamps on the hoses and disconnect them, slide the panel covering them off. (It's a real pain - See below how to modify it to be easier) Next, you will notice the plastic marked in 2 parallel lines the width of the heater core, grab a thin hacksaw blade and cut away 2 lines from below the head of the heater core to the bottom of the box. |
 |
12. Here's the final product. Looks funny -
but it works. And that's what counts!
|
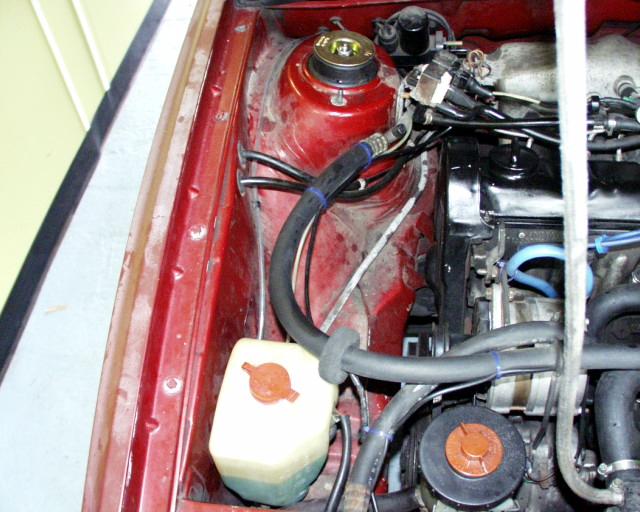
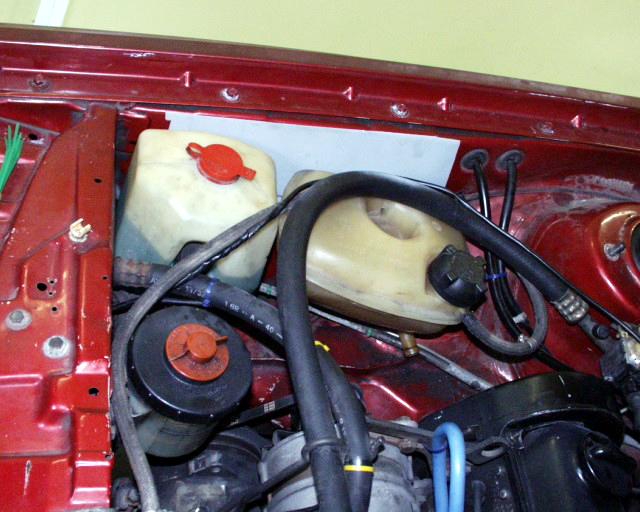
![]() Move the Coolant Expansion Tank
Move the Coolant Expansion Tank
Replace that ugly brown and green expansion tank. This is easy...
 |
1. This is where the bottle is moving to. |
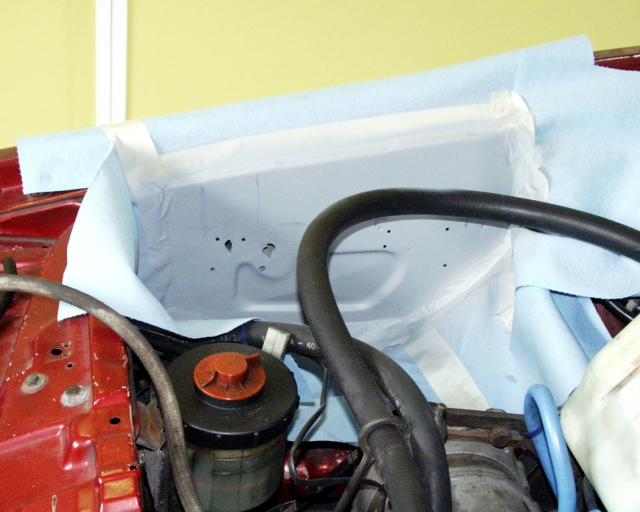 |
10. The new location being prepped. |
 |
2. Here's the old Location |
 |
11. Screw or rivet the plates in place. |
 |
3. Drain the coolant bottle, and remove the overflow hose. |
 |
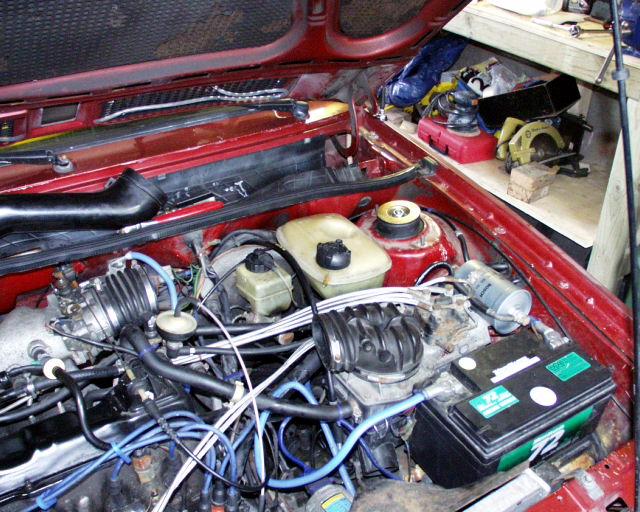
12. Place the bottles back on their brackets. |
 |
4. After it's empty, disconnect the bottom hose from the system - remember where this is for later. |
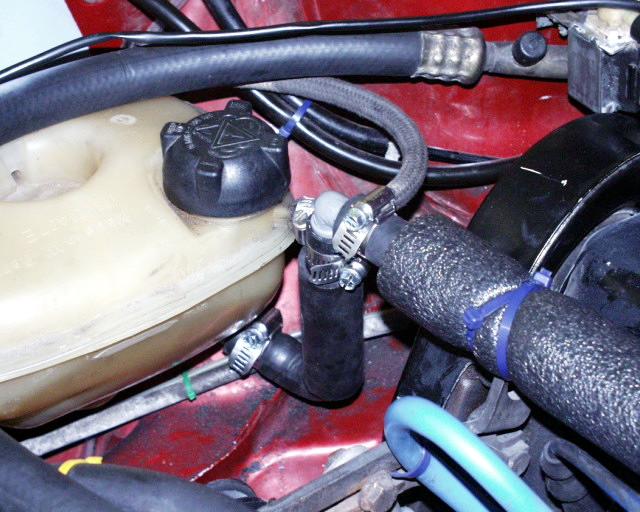 |
13. Now you have to reconnect it to the system. Get some
coolant hose (Auto parts store) and get some 90' pressure hose angles that
fit the hose, 6 clamps and a tube of hose sealant, and some hose insulation
to protect the fuel lines and spark plug wires. Just run the pipe across the engine to where the bottom hose was connected to. |
 |
6. Remove the tank, and get a cold chisel, and gently tap in between body and bracket until the 4 weld points are cut. Bend the bracket back to normal after you are done. |
 |
14. This shows the connection to the system |
 |
7. Drill four holes in the bracket and mark the spots on the new location. You have to move the windshield washer bottle bracket about 1" forward too. |
 |
15. Slide the hose insulation across the tubing that runs across the engine, and refill the bottle. |
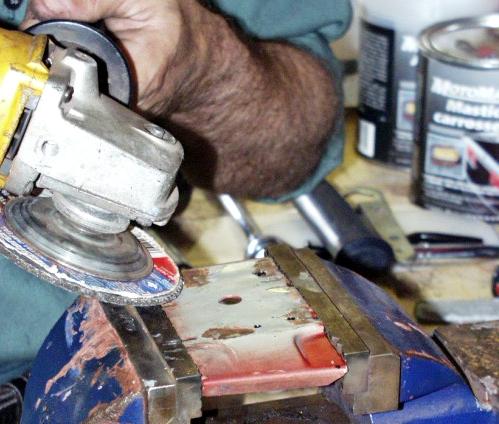 |
8. Make sure the back is flat, grind it, metal brush it clean, prime it, paint it... |
 |
16. start the engine - check for leaks. You can lift the bottle to get the air out of the system. |
 |
9. Meanwhile back in the engine, the sidewalls have been prepped for a nice coat of primer... |
 |
17. Done |
![]() Upgraded Radiator Fans
Upgraded Radiator Fans
You can find the Flex-a-lite Scirocco twin Radiator fan
here - or on
ebay...
|
|
1. Disconnect your battery and take it out of the car. The picture shows the location of the connector to the radiator fan, unplug that bugger. |
 |
7. This is where I hid my relays, Get your relays down here. |
|
|
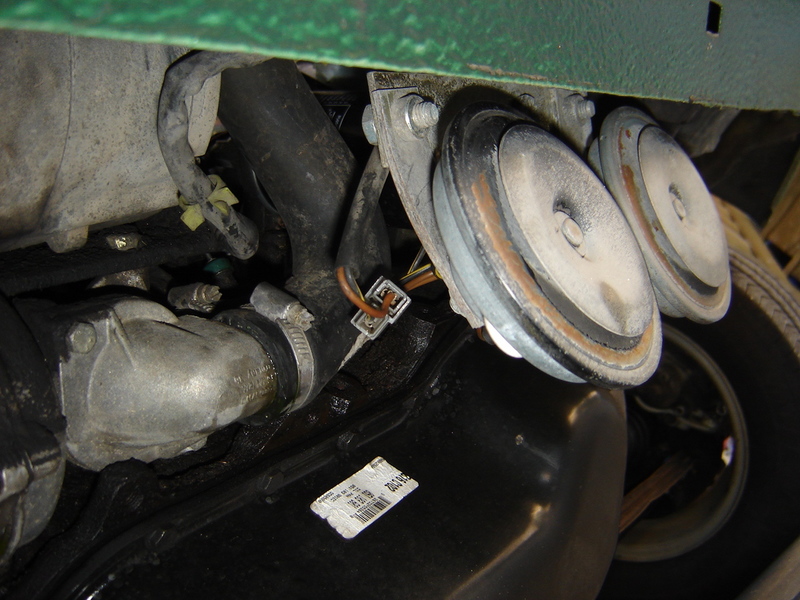
2. Driver side of the radiator , these bolts need to be removed. |
 |
8. Here's a picture of the way it's wired. |
 |
3. Passenger side |
 |
9. This shows how I passed the tie wrap through the shroud, buy drilling 2 1/8" holes in the shroud. Just run the wires to the temp sensor and power. |
 |
4. Here we have the Flex-a-lite "Scirocco" fan, the brackets are included in the price and make the mounting of the fan on your radiator simple. Just bolt it back on the opposite way you unbolted the original radiator fan. |
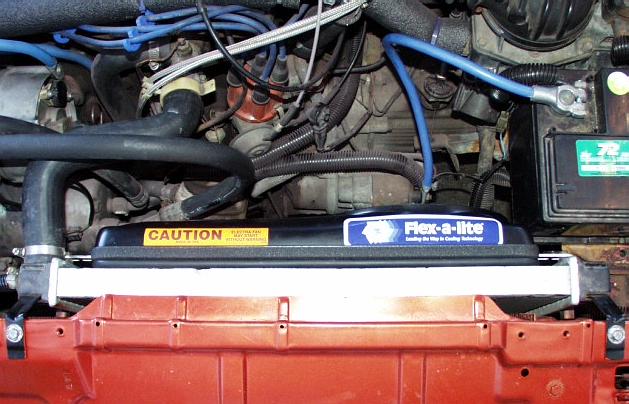 |
6. Look at all the new space! |
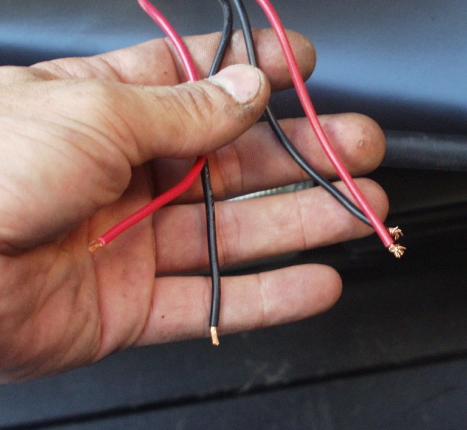 |
5. Wire the new fan up - Check the polarity to make the fans pull air toward the engine. Make sure you use heat shrink wrap or waterproof connectors |
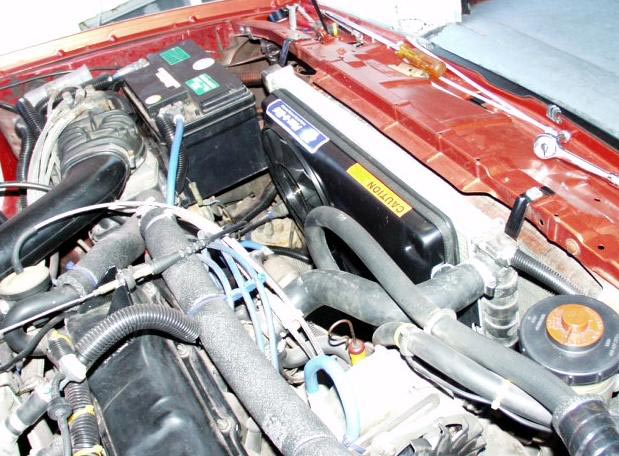 |
7. Another view. |

|
6. I take no credit for this part of the mod, it took it
from someone else's web page. I just constructed the tech note for it...
this diagram is plain and simple, easy to read.. if you're not color blind
you can do this.
*Added February 11, 2005 - Updated diagram for multiple speeds. |
||
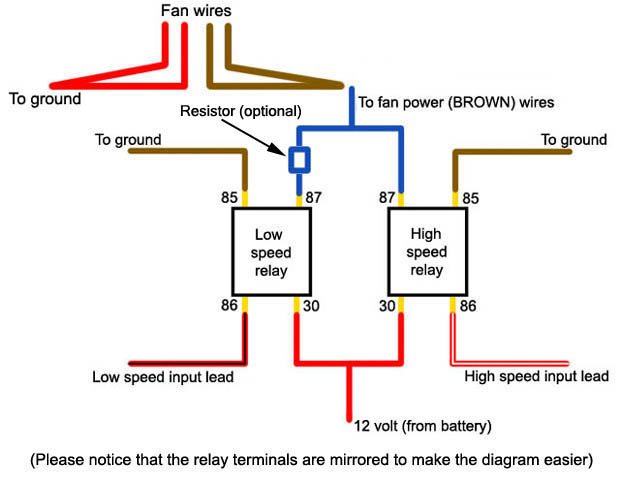
 |
$2.19 EA | Bosch 30A Automotive Relay |
 |
$1.19 EA | 30A Automotive Relay |
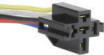 |
$1.50 EA | Relay Socket |
 |
$1.90 EA | 2 place Relay socket |
![]() Fixing the Oil cooler
Fixing the Oil cooler
Shown here is how to replace the rings on the oil cooler. You must
drain the oil to do this. If you replace the oil cooler with a new one -
you have to drain the oil and the coolant. DO NOT RE-USE THE OIL OR THE
COOLANT!!!
 |
1. Drain the oil, remove oil filter, take this nice big nut off of the shaft here... |
 |
4. Replace the o-ring. Put the cooler back on the flange |
 |
2. Slowly slide the cooler off of the flange. Remember to be careful of the hoses. |
 |
5. Tighten the big nut back down. Put on a filter and finish changing your oil... |
 |
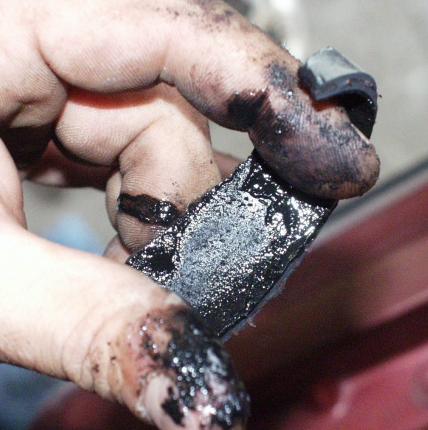
3. Here is the oil cooler removed from the flange shaft, CLEAN IT! | ||
Cooling system
Troubleshooting chart
From the Bentley Manual...
| Problem | Cause | What to do |
| Overheating |
|
|
| The heater doesn't work well, temp gauge low or none |
|
|
| The heater doesn't work well, temp gauge is normal |
|
|
| The heater works fine, temp gauge reads low or none |
|
|
Comment on this technote on the VWC forum
[Back to Top] [Index] [VWC Forums] [Contact/Donate]
Remember, If you need help with any of these technotes -Contact Me!
We are not responsible for damages caused while following the directions in these pages. These pages are for informational use only.
This site is in no way affiliated with or endorsed by Volkswagen of America or VW AG. Volkswagen and the VW logo are registered trademarks of Volkswagen
AG. To visit the official Volkswagen sites go to Volkswagen Germany
or VW of America.
All original images and content Copyright © 2001-2005 Eric Soltwedel, Tim McConnell and vintagewatercooleds.com, all rights reserved.
Not all of the pages comply with the new standards yet. I have the links here for debugging purposes.
![]()
![]()
![]()
About the Standards and Scripts