


Page last Modified:
Wednesday, February 15, 2006 12:41:39 PM - Views

|
QuickLaunch: |
[Oil Type] [Oil Pan Gasket] [Oil Pump] [External Oil Cooler] |
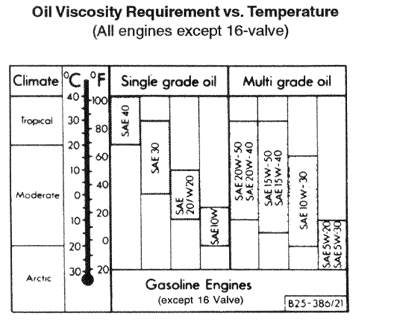
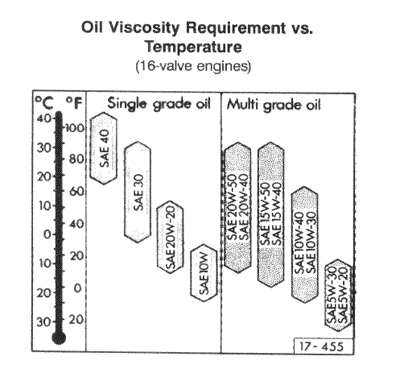
Oil Type
These are the VW OEM Oil Charts for 8v and 16v engines
| 8v Engines | 16v Engines |
 |
 |
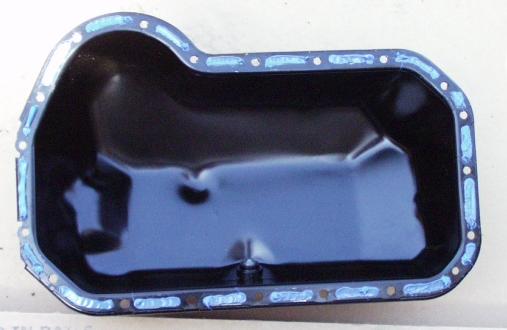
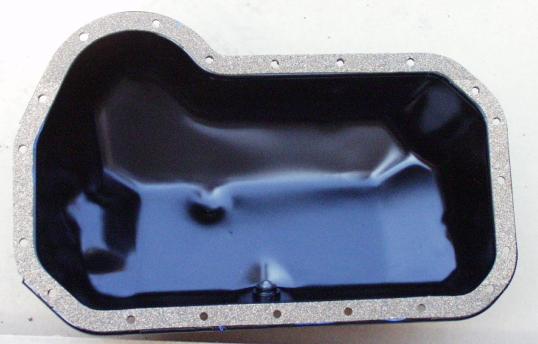
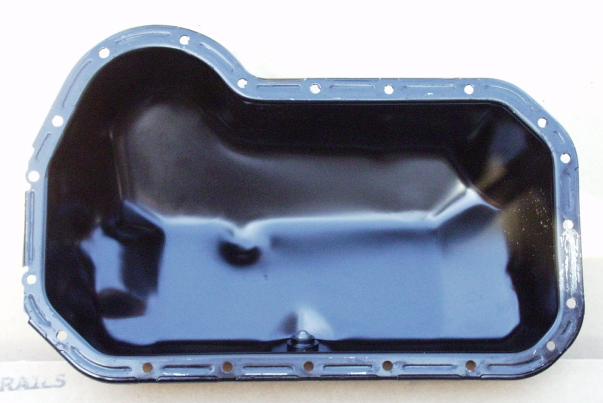
![]() - Replacing the Oil Pan Gasket
- Replacing the Oil Pan Gasket
This version of the Gasket Note uses the Cork Gasket. To get the rubber Gasket - Go buy one here or here.
 |
1. open the cap on your valve cover and remove your dipstick |
 |
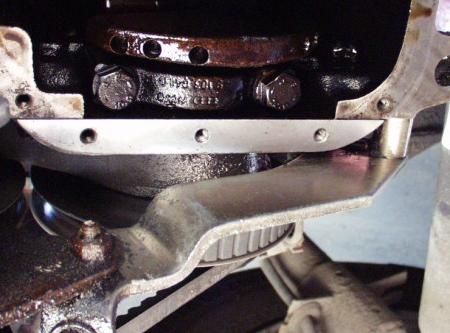
7. Blue silicon Gasket, small filament of it between each bolt hole, in the channel of the pan, this will help seal the gasket unto the pan. |
|
|
2. Here we have a close up of the bolt of the pan, drain the oil out... |
 |
8. Next I place the gasket unto the pan, pressing gently to get the blue silicon to stick to the gasket while this sits, I go ahead and clean all the bolts in a varsol bath and wipe each cleaned and dried. (if ya do something right... clean it first...) |
 |
3. while it is draining, remove the oil filter and clean this area. |
 |
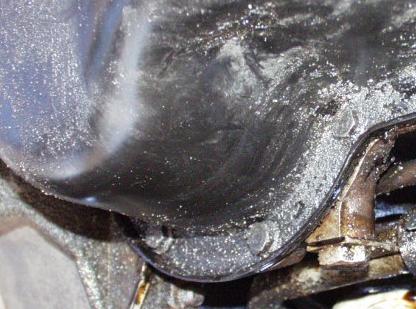
9. Cleaned area, nothing like crud on this edging bar to fall unto your gasket to waste all your efforts of putting a new gasket on. |
 |
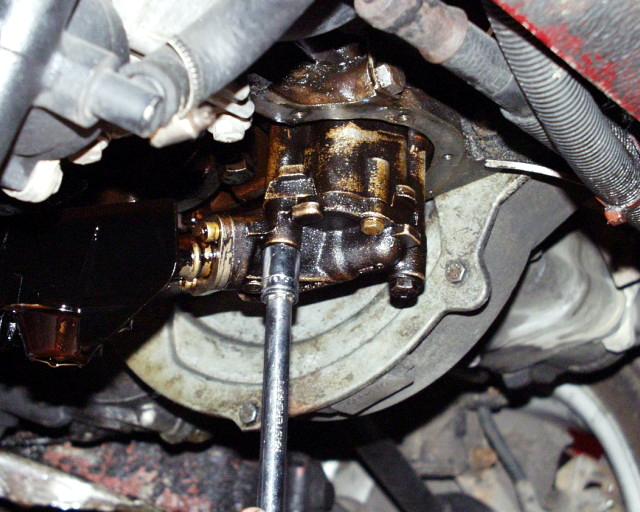
4. once the oils is all drained... time to take the pan off... here we show a few bolts of the pan I used a narrow socket, comes in handy when you get to the bolts between the pan and the tranny... |
|
10. Same thing on the tranny side, huge amounts of crud collect there, just waiting to fall into the new clean pan |
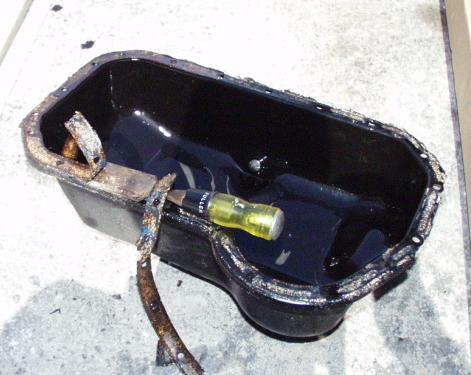 |
5. The pan is off, and I use a cold chisel to peel off the caked in old gasket... |
 |
11. Bolt the pan on... making sure your pressure all around is the same on each bolt. voila a job well done and proud of... |
 |
6. After cleaning out the channels out and wiping clean the inside of the pan with varsol | ||
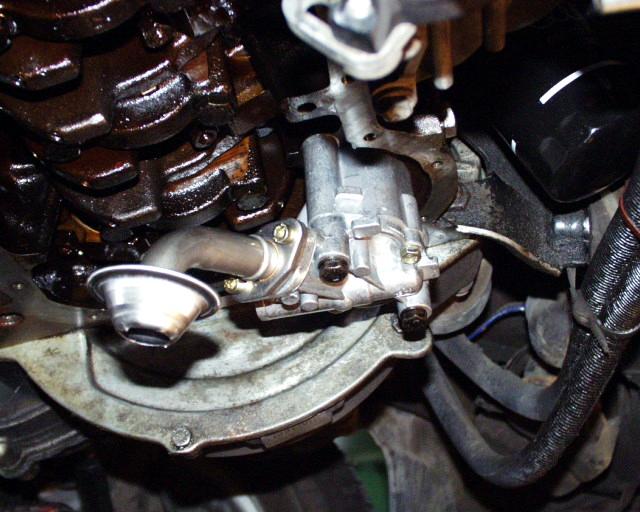
Well for years I have been running this car on 10w40, and after many months of reading how 20w50 is the oil of choice in a VW engine, and after I checked with my local dealership that confirmed this fact I decided to change my oil..and well... ended up at restart after the oil change, my oil pressure light would stay on, and remains on, and another fact is that previous oil change (10w40) my oil pressure oil was on for at least a minute before going out last time, so I decided that it was time to change the oil pump.... its actually an easy job (easier than changing a thermostat on a power steering Scirocco.)
 |
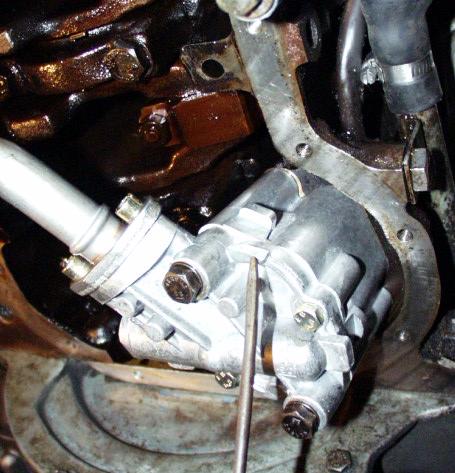
1. Drain the oil from the oil pan and drop the oil pan (see oil pan gasket technote) |
 |
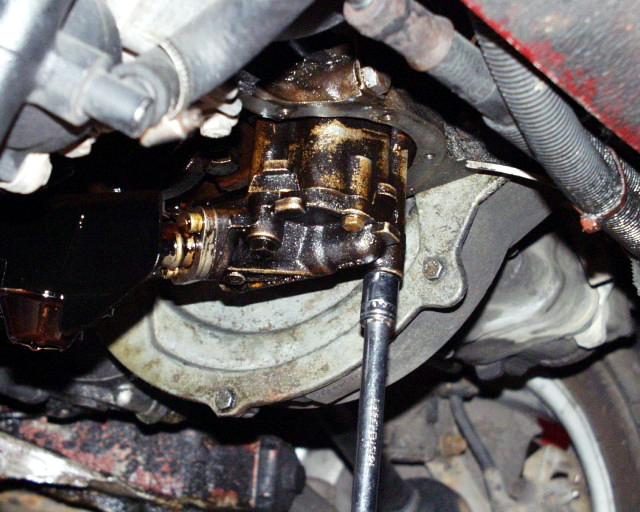
6. as you reassemble the pump, take the time to make sure the notched shaft is properly inserted in its place, this can take a few moments to figure out the angle of the notch but its a small delay. |
 |
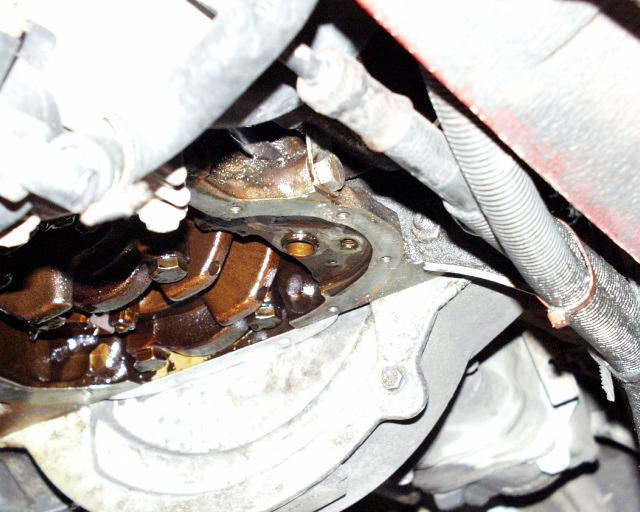
2. There is the first bolt holding the oil pump in place |
 |
7. There pump reassembled, this particular pump was made by Bilstein, and we had some difficulty closing up the oil pan, we discovered the culprit, pointed out with a screwdriver in the picture... its aluminum casting, grind it... your done. |
 |
3. and here is the second bolt holding it in place |
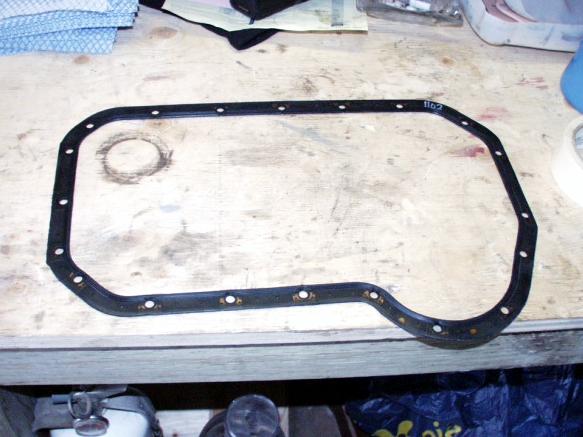 |
8. Side note: Found this great Rubber oil pan gasket while getting new oil pump was a mere 25$ Canadian, but well worth it... |
 |
4. pump gone....now wasn't that easy? |
|
9. a close up of the same gasket, see the ribbing, this should provide really nice leakage protection and the gasket is mounted on a metallic base, quite sturdy. |
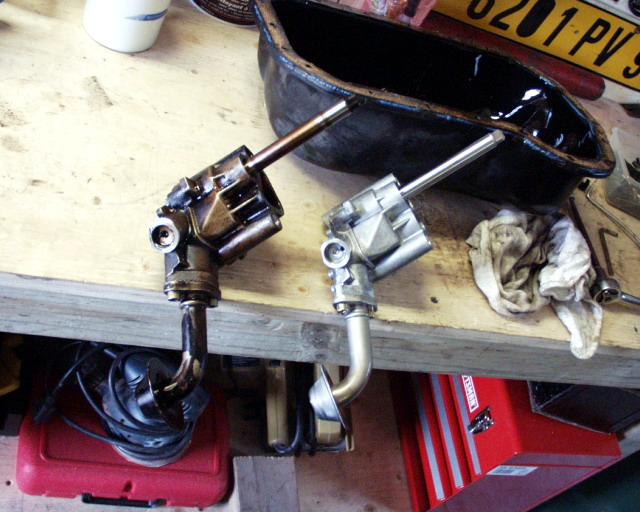 |
5. compare the 2 pumps together to make sure they are identical (height/width) | Back to Top | |
Before putting my engine back into my scirocco last june, I planned to use a GTi European Oil flange. it has the capability to run 2 hoses from it to an external oil cooler, armed with that knowledge I spend 5 months scouring the local scrap yards, finally found a volvo 740 oil cooler.
Please note this tech note ONLY covers the Oil cooler install, but this install will work that you have either the Euro Gti or MKIII USA oil Flanges, or the TT Sandwich Plate.
 |
1. so here next to the radiator is the location where I plan to install the cooler, now please be advised that this mod works in this location if you do not have a power steering rack on your 8v (16v guys are on their own..lol) |
 |
9. Dry test fit of the oil cooler and bracket in its future location. all looks well? lets move on to completing the install shall we? |
 |
2. Lets make a pair of brackets for this custom install. grab 16 gauge pre holes aluminized steel in the local home depot now these come in 6ft stretches, this picture shows you where the final cuts have been made |
 |
10. Using washer and self tapping screws |
 |
3. here you see the precut steel, now mark it so that the line indicating the edge where the screw hole will be drilled fits properly |
 |
11. un attach the lower bracket from the oil cooler, then place it flat on the front frame. now mark the two inner holes of the bracket (or drill your own in a single sheet type) |
 |
4. in case you did not understand what I mean in the previous picture, see the blue line runs between holes...to make sure the bracket, is as, solid as it can be. |
 |
12. and attach the bracket to the frame with the screws and washers. |
 |
5. using the vise, I place the line I drew earlier on the steel into the lips of the vise. |
 |
13. attach the bottom end back to the oil cooler, now the top bracket I used the same idea the radiator is using to hold it in place, why reinvent the wheel when I have tons of spare parts, |
 |
6. and using a hammer and my strength (bending it at first with my hands) I hammer the steel to make a 90 degree angle. repeat on each end of this piece. |
 |
14. So using the modified radiator bracket, I modified the top part of my
bracket holding the oil cooler, and there you are the oil cooler is solid
and safe, now install the Gti flange, MKIII OIl Flange or the TT Sandwich
plate and hoses to your cooler. and enjoy.
|
 |
7. dry test fit, see now how the holes that need to be drilled will end up in between pre-drilled plate. | 15. I got my brackets off the car, steamed clean the radiator, and painted and cure the brackets with header primer/paint and cured the 2 brackets for 2 hours in a mini oven. sorry no pictures.. | |
 |
8. After drilling the holes on each end of the brackets, I reused the bolts that came with the oil cooler and repeat the extra same process to make the second bracket and affix it the same way to the oil cooler. | ||
Comment on this Technote on the VWC Forums
[Back to Top] [Index] [VWC Forums] [Contact/Donate]
Remember, If you need help with any of these technotes -Contact Me!
We are not responsible for damages caused while following the directions in these pages. These pages are for informational use only.
This site is in no way affiliated with or endorsed by Volkswagen of America or VW AG. Volkswagen and the VW logo are registered trademarks of Volkswagen
AG. To visit the official Volkswagen sites go to Volkswagen Germany
or VW of America.
All original images and content Copyright © 2001-2005 Eric Soltwedel, Tim McConnell and vintagewatercooleds.com, all rights reserved.
Not all of the pages comply with the new standards yet. I have the links here for debugging purposes.
![]()
![]()
![]()
About the Standards and Scripts